
Sending a quick email via AWS SES from your new app. Sample code, steps to implement, details on every steps - why's and how's
In my previous post I have covered the "getting started" portion of AWS SES. Now that you're up and running with that and able to send emails using your SES account, let's move on to an actual email sending.
I will be using Visual Studio 2017 to create a console application with C#. You can download the whole application from this case study from my github.
Setup SES user
I would highly recommend to create a separate user for your SES activities and grant only SES permissions for that user. In your AWS Console, find an IAM service, go to Users page and click on Add User button. In the add user form fill in the user name, I prefer to name my service users with whatever the service they're grant to - for example, "ses-user". Check the box "Programmatic Access" in the Access Type section, hit "Next: Permissions".
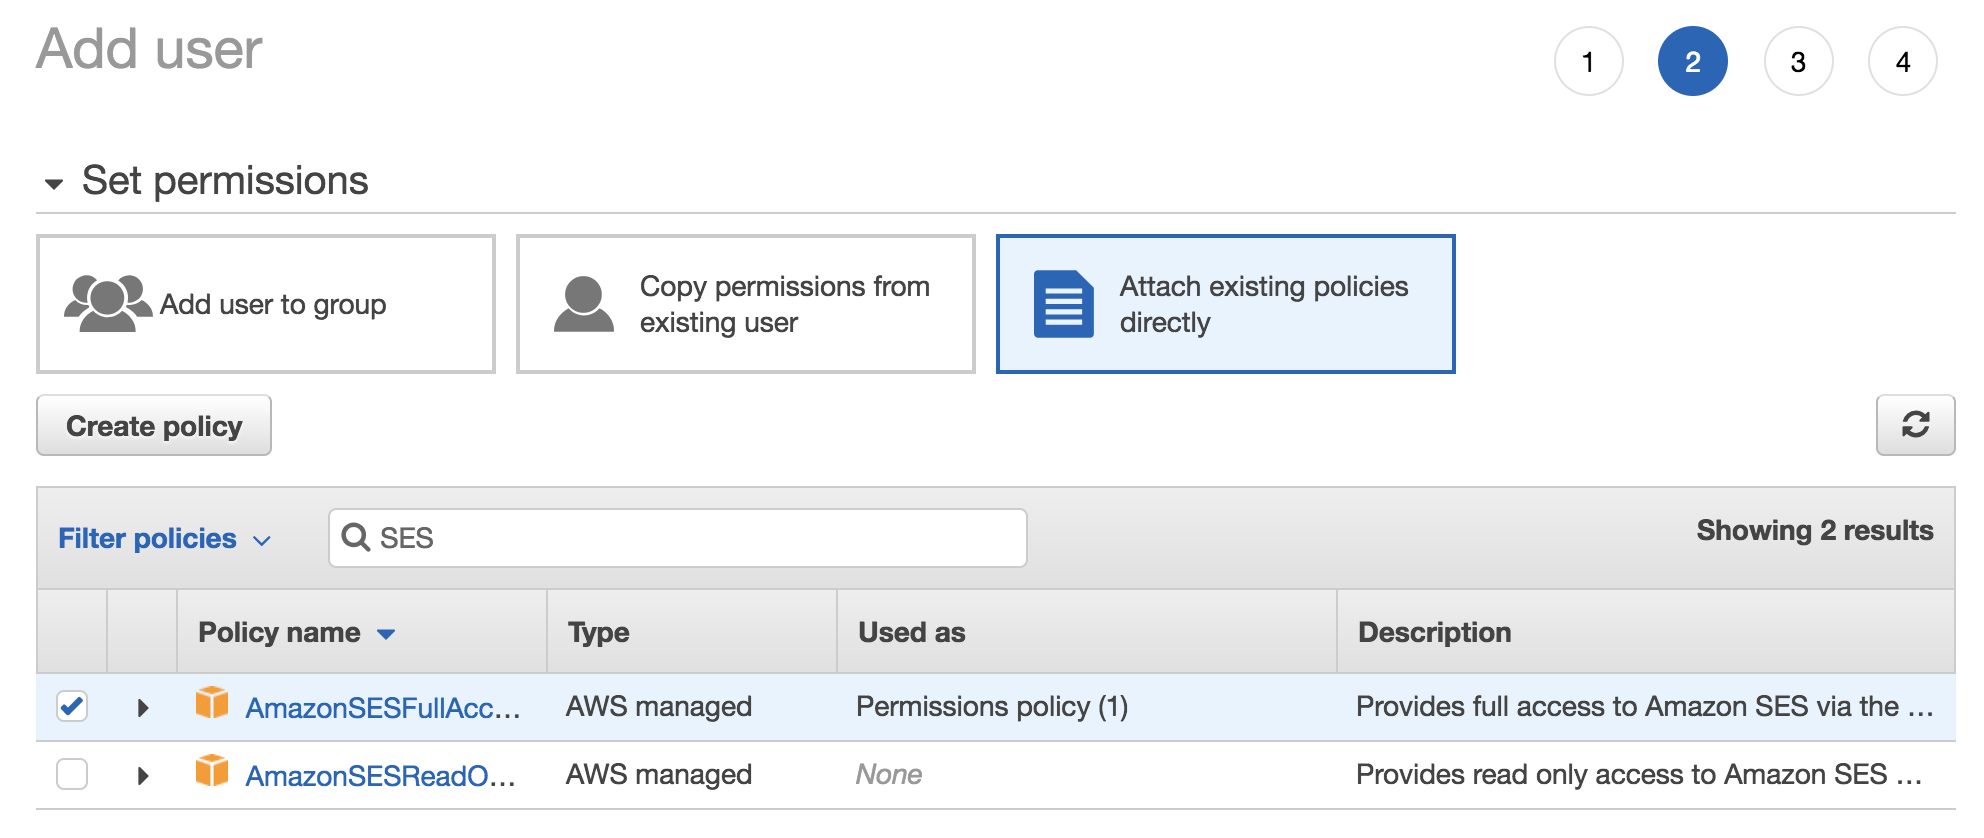
On the next page, click on "Attach existing policies directly" tab, type in SES in the search bar - you should see a couple of policies there - full access and read-only. Select the full access one and hit "Next: Review".
Finally, hit "Create User". On the next screen you should see the access and secret key, see screenshot below.
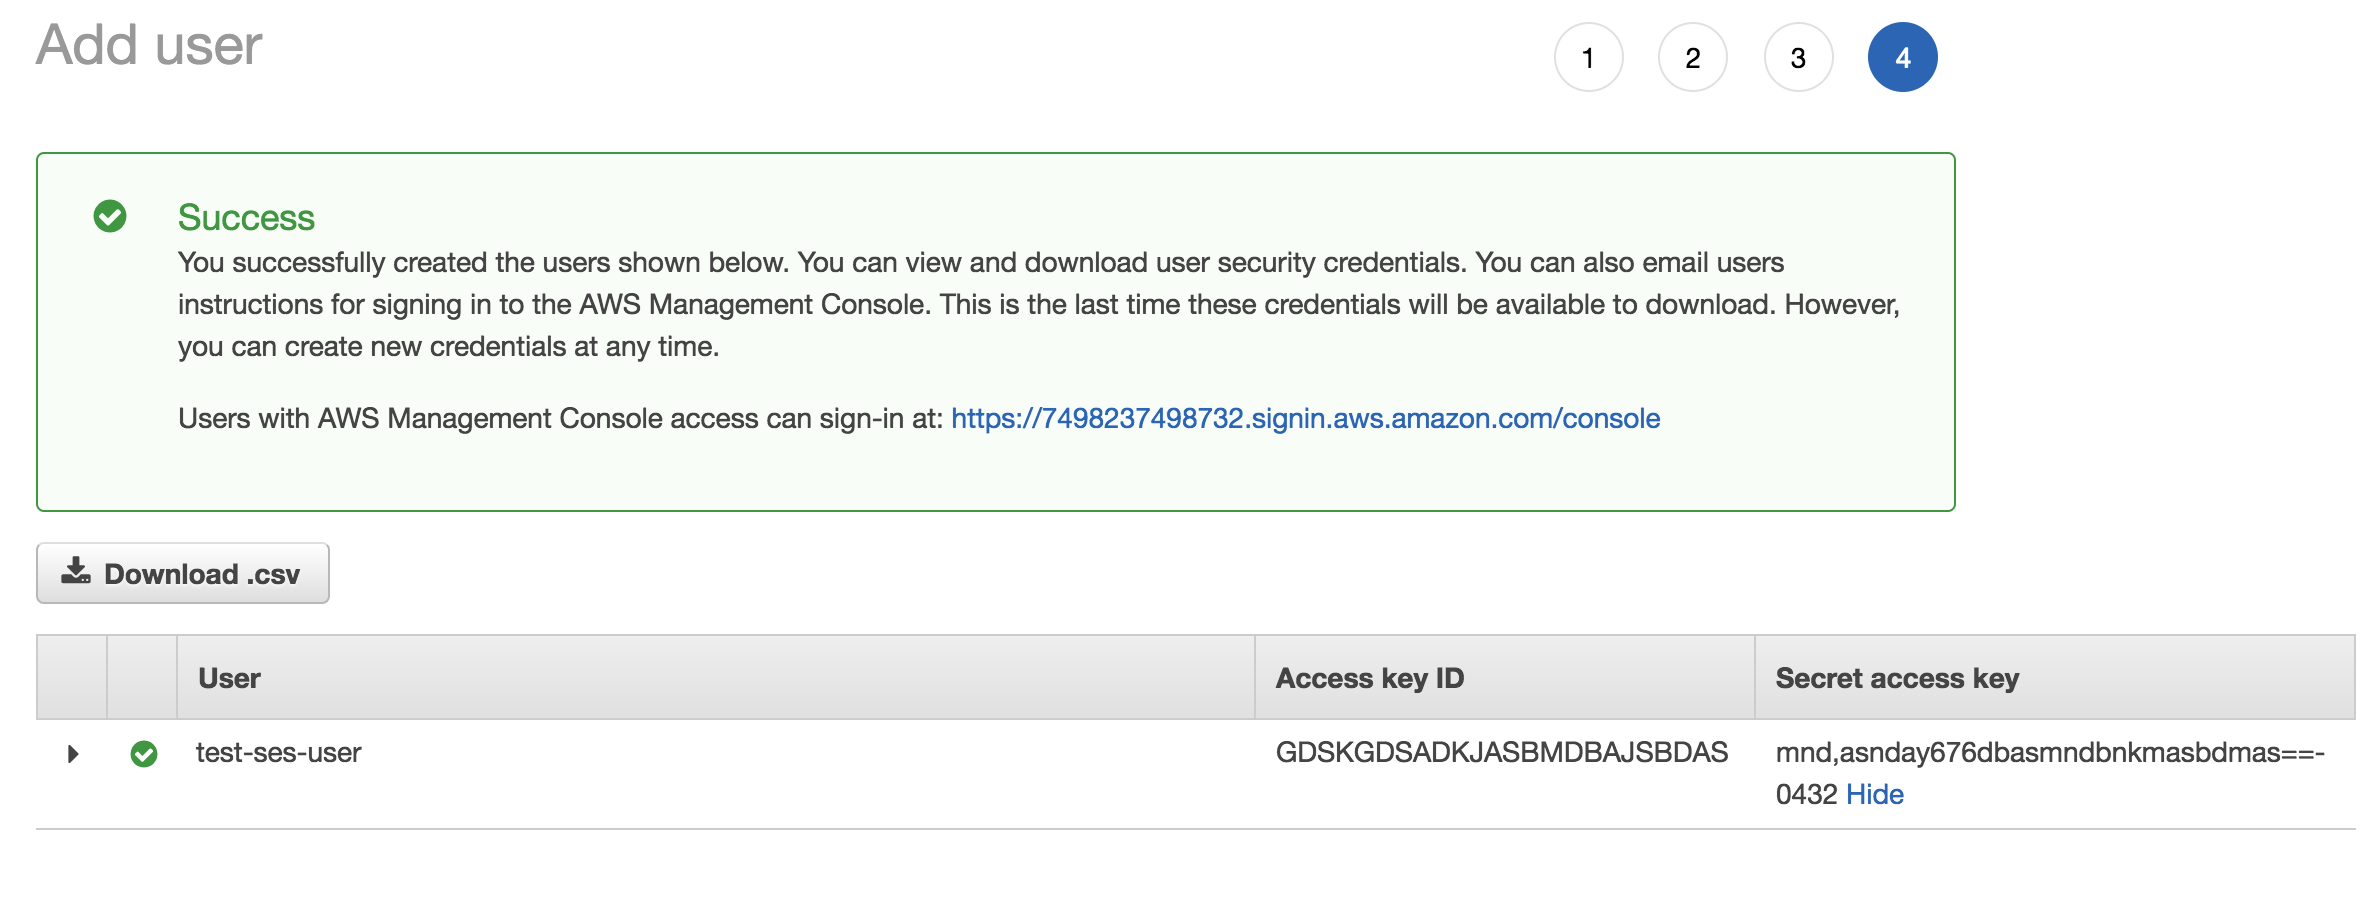
Don't worry - I have modified keys to some random values there. Copy these keys, and download the CSV file into a safe place. I recommend creating a DropBox account and storing your credential files in a special folder, for example "AWS Keys" - this way it's always handy.
Create a new project
Now we're ready to get some coding done! Open a new instance of a Visual Studio and create a new Console Application project with C#. We're not going to touch the Program.cs for now, let's open the App.config file and add some AWS settings. We're going to need AWS Access Key, Secret Key, Region, and the email address you're going to be sending your emails from. Here's the appSettings section with all the needed info.
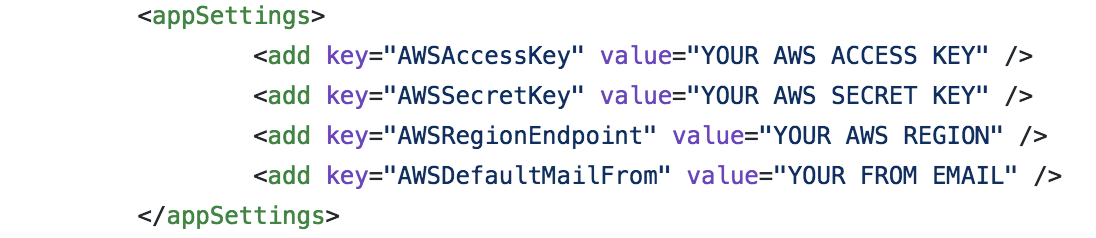
Just replace the values with the keys you grabbed from previous step. As for region, put in your region you've set up your SES account with. It should looks like this: "us-west-2". For email - add any email you like with the domain you have DKIM enabled for. Refer to the previous post about setting up your AWS account for details. If you have DKIM enabled for the whole domain, you can use any user account with that domain, I usually put "no-reply@mydomain.com" - this is the email your recipients are going to see in the From field.
Add some code
Go to your project's NuGet packages view, and search for "AWSSDK.SimpleEmail" - add that one, it should also add the AWSSDK.Core package automatically. Now in your Program.cs file, add the code inside the static void Main() - just grab it from here.
Quick walk-through on the code:
- Inside "using" block it creates a new instance of AWS SES Client from AWS SDK library. You'll need to pass in your access and secret keys along with region to the constructor.

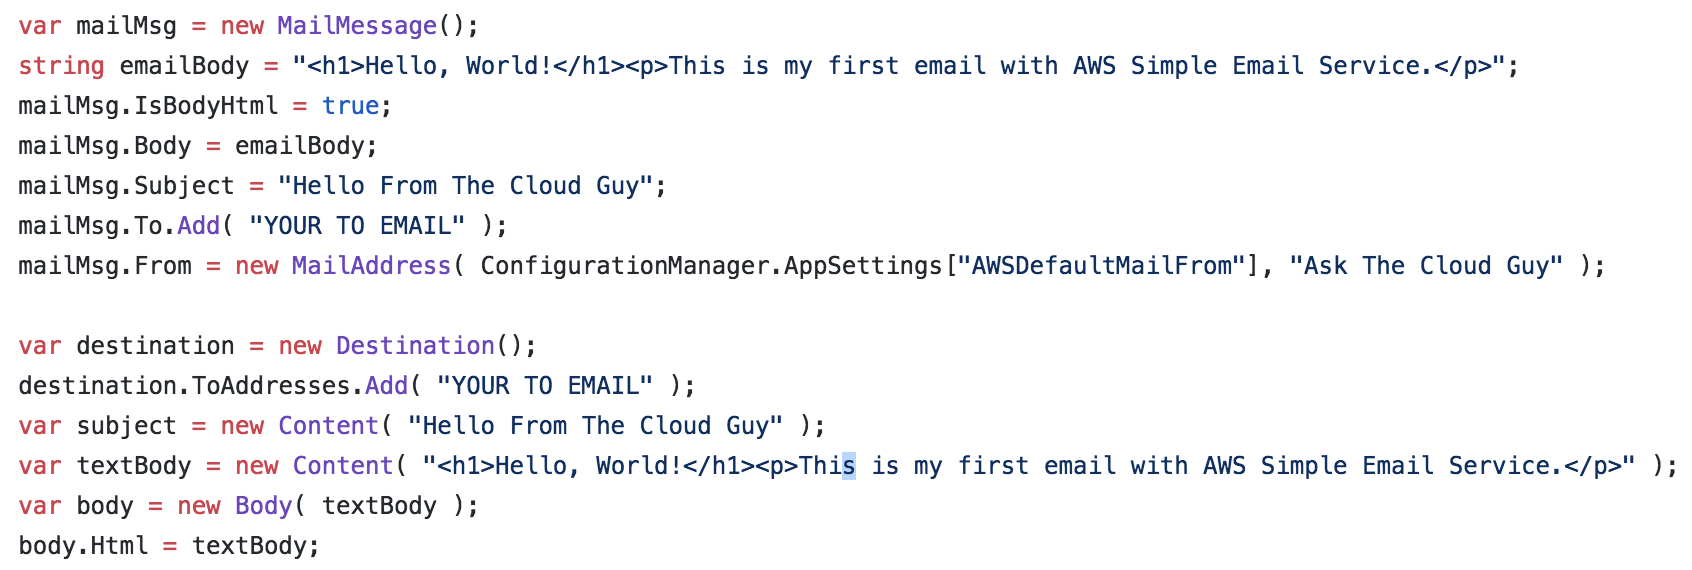
- Next, create a new instance of System.Net.Mail.MailMessage class. Fill it in with properties like email subject, body, from, destination, etc. In the "to" field, add a valid email address.
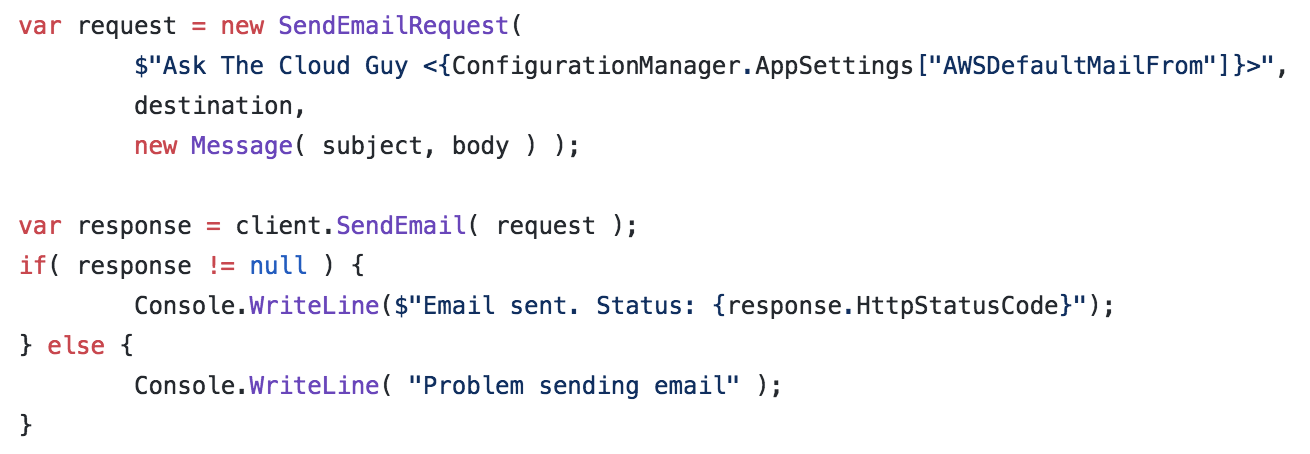
- Now we're ready to send that email. For that we just need to create a new instance of SendEmailRequest class from AWS SDK and call upon client.SendEmail() method. You will get a response back with details on that email transaction - Http status code, some messaging, information if something failed. In the future you could log all this valuable information with each email send. I recommend retaining all the information you get.
Again, you can go to my github repo and download this application for your reference.
Happy clouding!
The Cloud Guy
Any questions or comments are welcome as long as they are relevant to the topic. The comments are moderated and are manually approved - don't bother spamming.