
Getting started with AWS Simple Email Service - Setup, Domains, DKIM, Going Into Production Mode.
What I'm covering here is practical steps on getting you into AWS SES as fast as possible. If you'd like to know more about what SES is and what it is about, you can find plenty of information on AWS documentation website about SES
Create an AWS account
First off, you need to create an AWS account if you don't have one already. The registration is simple - go to AWS Website, find Sign Up button, fill in the form on the next page and submit. AWS gives you one year of free tier services. Now, that doesn't mean you can use the whole AWS for free for one year - they only give you free basic services. This should be enough to get started. When I first signed up for it I used free-tier services for my development needs, it was sufficient.
When it offers you to select your region - either right off the bat at registration or later on, it is a good idea to keep all your services within one region. Select the one that is closest to you and keep selecting this region for all your services you are going to use.
Have a Domain
In order to start using SES, you'll need a domain you can control DNS for. This domain is the one you're going to be sending your emails from. The best way (and this is how I did it) is to register your domain via Route 53 AWS service - it's easy to use and it will give you an advantage compared to other domain registration services. If you already have a domain I would recommend transferring it over to Amazon Route 53 if possible. If not - not a big deal, you will still be able to use AWS SES without a problem.
The reason for preferring Route 53 is that everything can be done inside your AWS console and it takes minimum amount of time to propagate DNS changes on your domain within AWS.
Verify Your Domain
Once you're all set with your AWS account, find and click Simple Email Service link in your AWS console.
On that console page you will see the menu on the left with some links, click on "Domains" under Identity Management menu section. This page should be empty (provided you just started) - this is where you will verify your first domain.
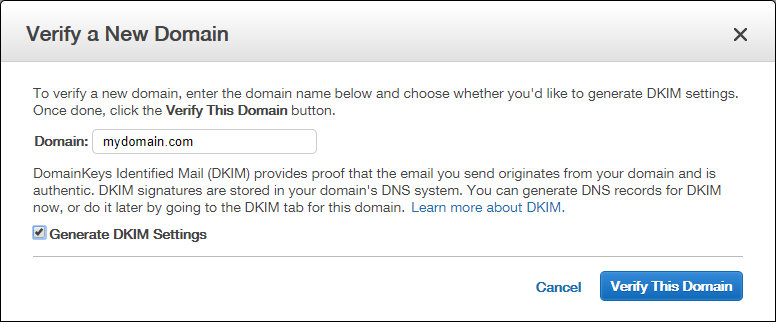
Fill in your domain name, don't forget to check the "generate DKIM Settings" box. This will allow you to send emails from your domain without recipients seeing the nasty "sent via aws ses" sort of message in the email from field. What this does is it confirms the domain truly belongs to you, since AWS uses its own ways of sending emails on your behalf, it needs to be sure it comes from you and that you "sign" for it. Here's a great page about DKIM - it explains what DKIM is and what it is for.
Once the form is submitted the next screen will present a bunch of info to you. Don't be scared like I was when I first saw that.
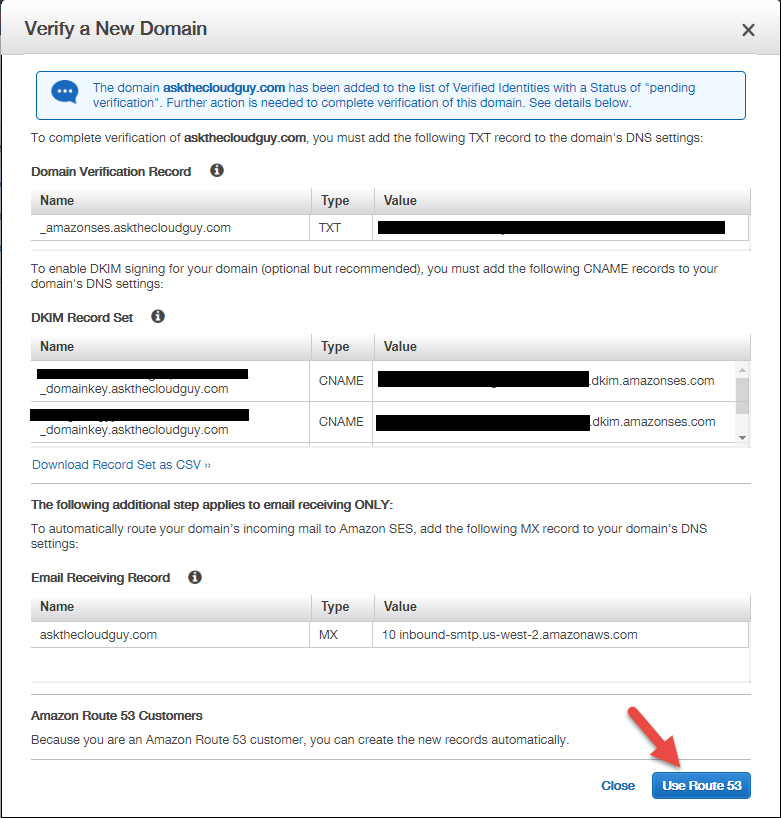
This stuff is all about confirming your domain. In order to enable DKIM you will need to add the entries you see on the image to your DNS. And this is where using Route 53 comes in very handy - if you're all in with that, clicking on Use Route 53 button will do all of the above for you automatically.
After this step is completed, you should see your added domain in the domain list with "pending verification" status:

Give it some time for your domain to get verified - AWS needs to query your domain's DNS for the records you were supposed to add. Once confirmed, you are ready to start sending emails!
Note: by default your SES account will be in test mode, meaning you won't be able to use it for production email sending. When you're ready to switch to production mode, you will need to submit a support ticket with AWS. This is very easy to do - they will provide you with a quick-and-easy template to fill in and submit.
Happy clouding!
The Cloud Guy
Any questions or comments are welcome as long as they are relevant to the topic. The comments are moderated and are manually approved - don't bother spamming.